NOTE: this guide is for previous version 2008-10-10. It was replaced
by new one and it does not have left Files panel and syntax coloring and
code completion.
My experience with new programs is to folow tutorial instructions
(sometimes several times :-) ) to learn usage of it. So I try to
describe Karel using. If you have any recomendation write please.
I suppose your karel is installed and running by some way
(see installation advices ).
Open (or create) project (my name is karel_testing).
Generated Main class is not necessary so you can delete it.
NOTE: Specal karek-project has not be implemented yet.
Create new karel script source named towall.
Menu File / New file / category Other > Empty karel file or
the same way by right clicking on source package.
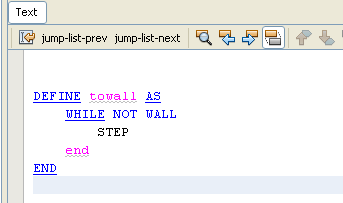
Begin writing "define" word - code completion offers to you keywords.
You can select one and insert it by enter.
Continue writing command name "towall" and "as" (in English localization).
Write full command definiton as folows:
It defines actions to getting robot to the nearest wall.
NOTE: Code completion is no clever how I planned and indentation is preparing now.
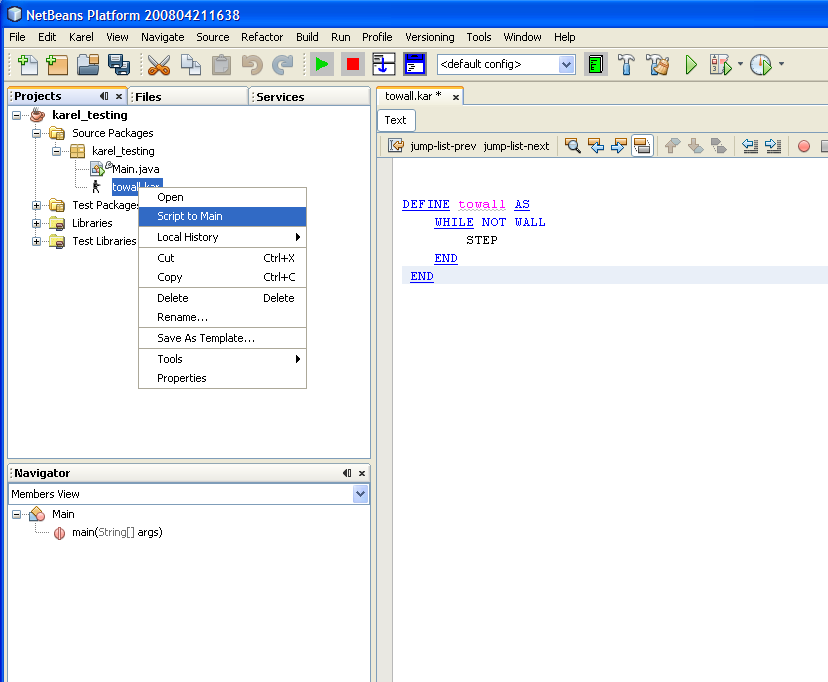
Save it by diskette button.
Select Script to Main window from context menu of our new file.
Main window of Karel runtime was opened. You can open it separatelly
using menu Karel / Main Karel.
If your script is not in textarea down you didn't save it probably.
Activate script tab, save it and retry action.
Necessarity of saving will be repared in future version.
Press Run button
to run your script. New command TOWALL was defined and it appeared top in command list
which are available in dictionary.
Doubleclick on this command TOWALL in commands list.
Command will be executed and Karel moves to right wall.
Congratulation! You can programming of robot Karel!
Double click on LEFT command to turn robot left.
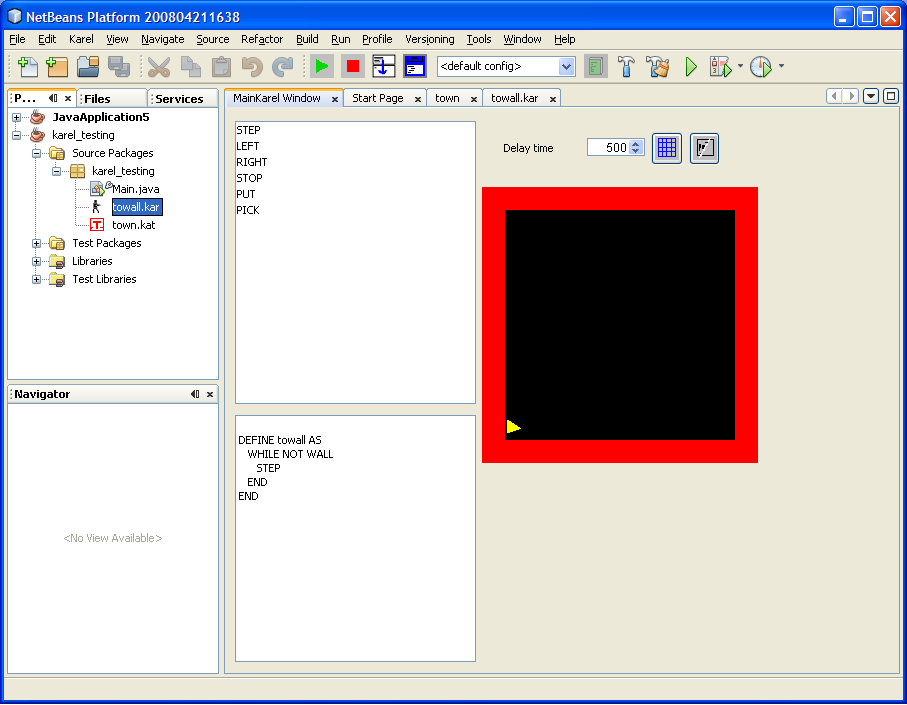
Clear script area and type "towall" into it, press Run button and see:
Karel is moving up to north wall.
It was other way to run commands.
Select TOWALL command in list and press Get Command definiton button:
.
Definition of command appeared in textarea. So you can get command
and repair it or copy for some similar command.
Rewrite TOWALL name in definition to TOEAST , word WALL to EAST and
command STEP replace by LEFT. Run it and try function of new command.
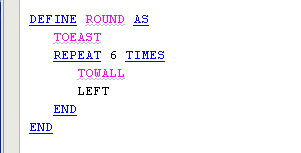
Define new command ROUND
and try run it.
If you can have running quicker or slower you can set Delay time spinner
to wished milisecconds after each atomic command.
Create new karel script file called e.g. dictionary.
When new file opens press Get full dictionary script button
.
Content of dictionary (commands definitions) was loaded into source.
You can save it.
If some problem appeared write me a report please. May be there is
some cycle in definition that writer can't handle.
Try to make some error in the script e.g. STEP replace by SPRING and save it.
Notice node icon in files tree is signed as bad file. Repair and save file.
Content of file is checked on syntax and commends existence in this file.
Enjoy playing with karel.
Some problems can be appear because all has not be tested yet e.g.
complex commands structure, recursion and so on.
If you need to stop running press Stop button
.
Send robot into the wall. He will be angry.
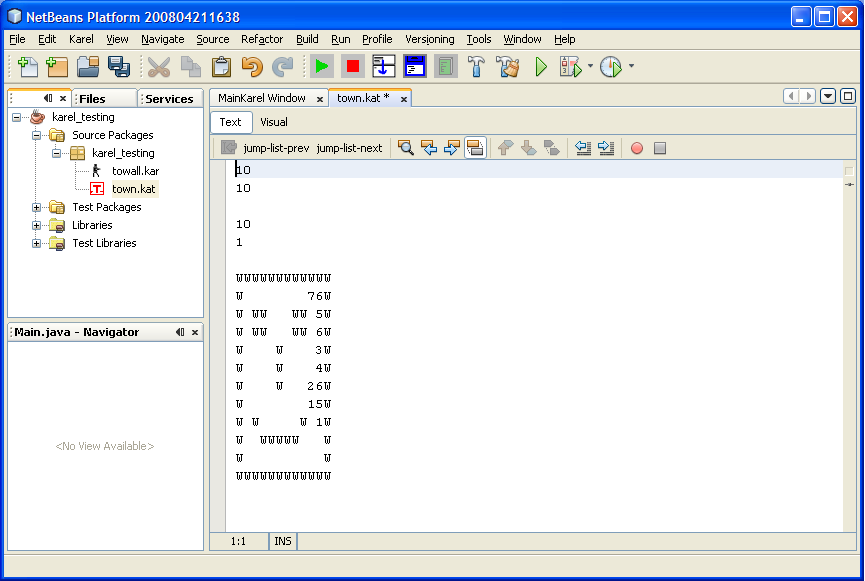
Working with town
Create or open some project.
Create new karel town source named e.g. bright name town.
Menu File / New file / category Other > Empty Town file or
the same way by right clicking on source package.
You have standard empty Karel's town 10 x 10 squares to editing.
You can show or hide helpful grid by Grid button
or clear made work by pressing Clear button
.
To set or remove wall to selected square click by left mouse button on it.
Try dragging by left mouse button and enjoy raster graphic!
To add sign on square click by right button on it.
To remobe one sign from square click by left button.
Some user will certainly try right mouse dragging :-) .
All changes appears in text editor accordingly visual editor.
Some changes in text editor can corrupt file structure.
Save your clever graphics.
Try change values in text fields
- town size and robot initial position.
To use edited town in runtime
select Script to Main window from context menu of our new file.
Next steps
Tips
NetBeans editor provides good feature to code completion.
If you are typing command name which name you forgret
you type beginning and press CTRL+K (repeatedly)
until wished word will appear.
CTRL+K searches matching words and offers them.
Commands defined previously in source (dictionary)
will be offered in code completion in next release.
Be free to play and program Karel's moving. You can teach him
(why to write it if Karel is our friend? ).